Setting up e-mail filters
Murena cloud supports use of email filters that automatically organize your incoming emails.
Tip: Before you follow the steps below, decide which filters you wish to setup and create new folders for it.
Setup an email filter on Murena cloud
-
Visit this link to the Filters section or navigate to
Murena dashboard->Email->Settings(gear icon at bottom) ->filters. -
If asked, login with your Murena account e-mail and password.
-
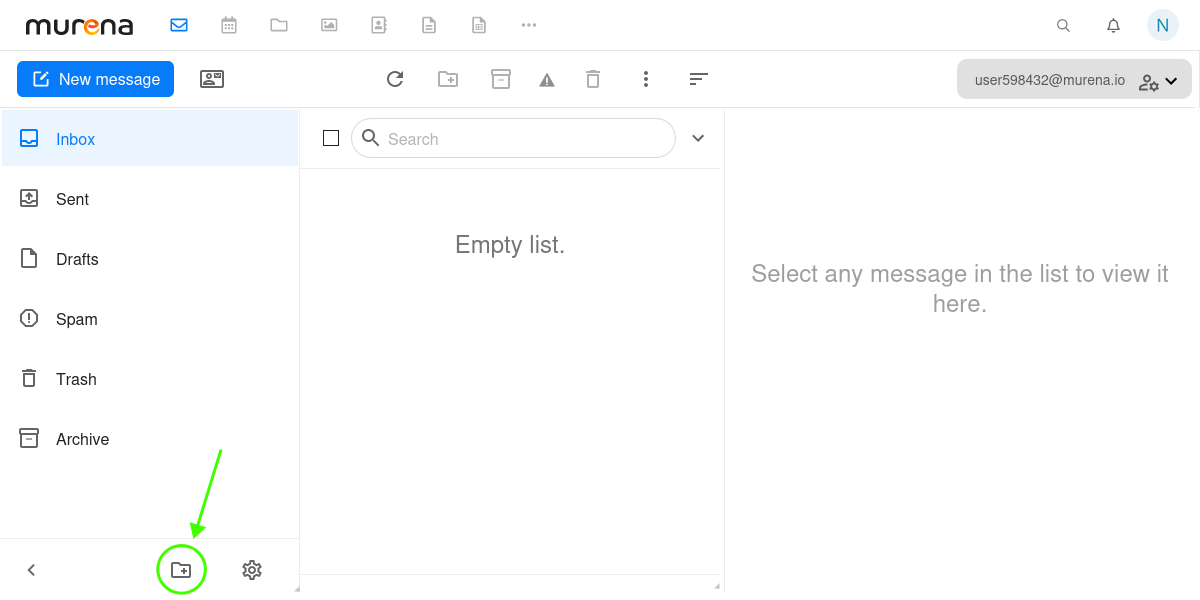
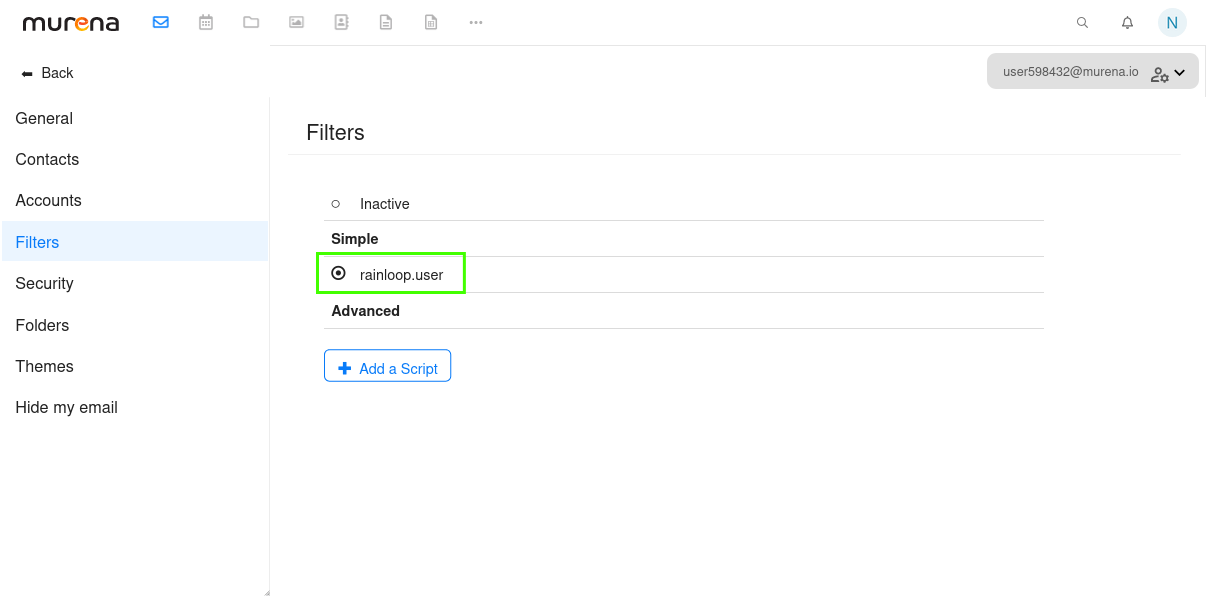
Click on
rainloop.useras shown in the screenshot below.
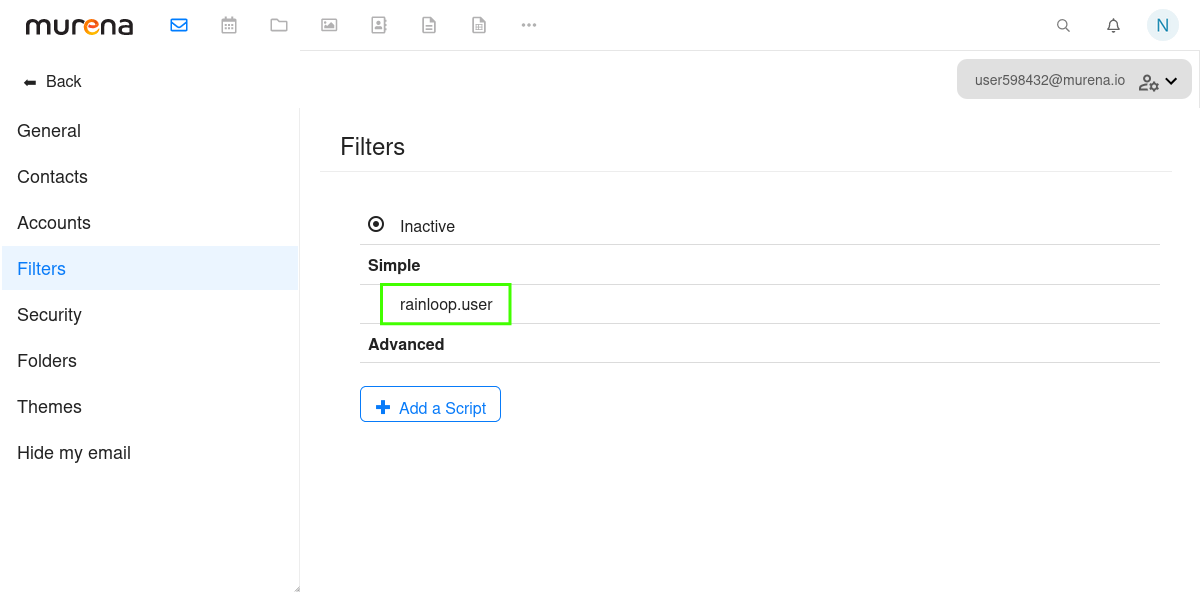
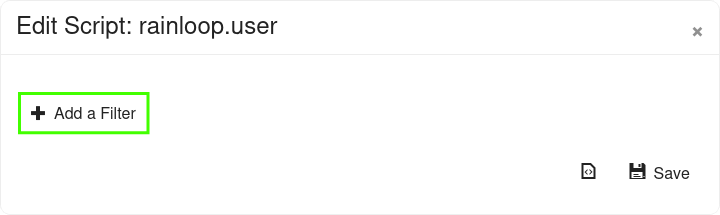
- Click on
+ Add a Filter
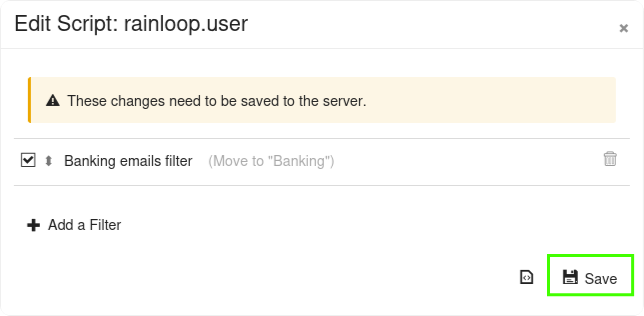
- Next, setup the filter as per your requirements. For example, the configuration of filter in the screenshot below will move all incoming emails from
mybankemail@example.comto the folder namedBanking.
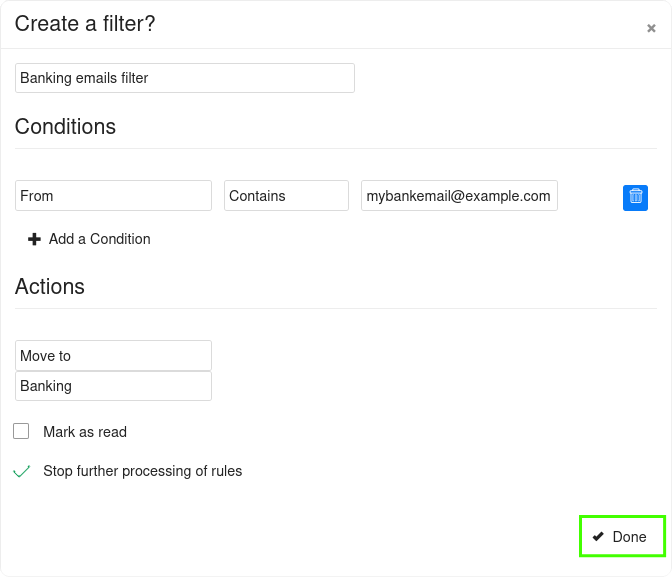
- Don’t forget to click on
Doneand thenSave, otherwise your filter will not be saved.
- Finally, activate your filter by selecting the
Dotbesiderainloop.useroption.
Use email filters with Hide my email
-
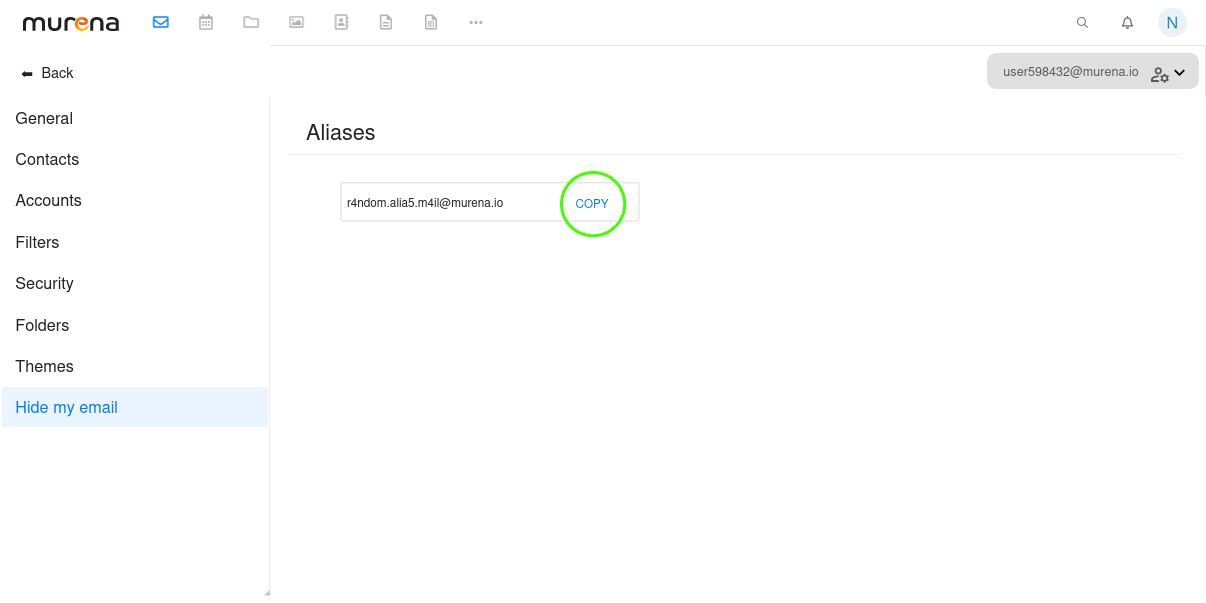
Visit this link to view your Hide my email alias email address.
-
If asked, login with your Murena account username and password.
-
Click on
COPYto copy your Hide my email address.
- Use the copied email in the
Conditionssection when setting up an filter.
For example, the the configuration of filter in the screenshot below will move all incoming emails from r4ndom.alia5.m4il@murena.io to the folder named Alias emails.
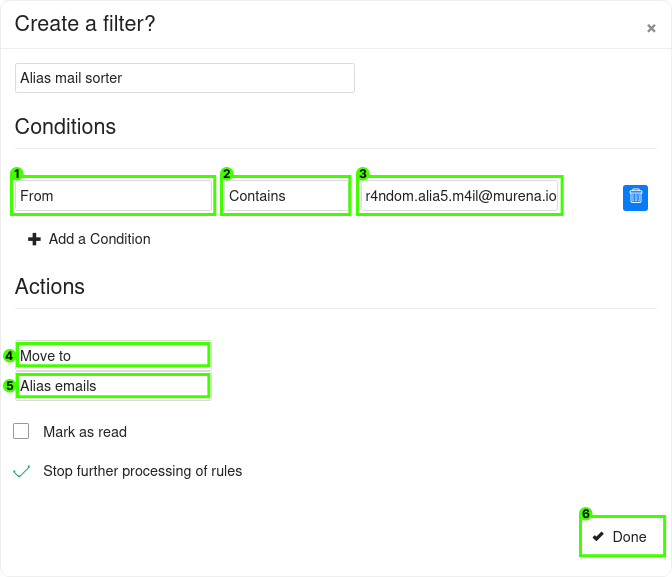
- Don’t forget to click on
Done, thenSave, and then select theDotbesiderainloop.useroption, otherwise your filter will not be saved.